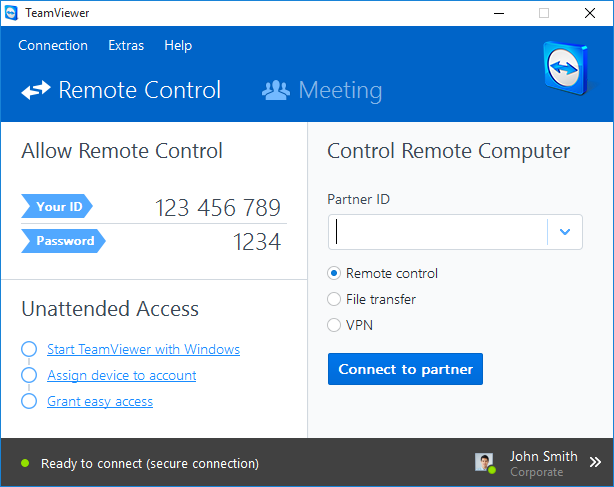
TeamViewer 9.0.24322


 TeamViewer ကေတာ့ လူတိုင္းနီးပါး သိၾကမွာပါ ကြန္ျပဴတာမွာ မရွိမျဖစ္အေရးၾကီးျပီး အသံုး၀င္တဲ့ေဆာ၀ဲ ဆိုလည္း မမွားပါဘူး။ မသိေသးသူအတြက္ ရွင္းျပပါမယ္။ TeamViewer က ဥပမာ ကို႕ ရဲ႕ စက္ တခုခု ျဖစ္လို႕ ကိုက ျပန္မျပင္တတ္  အဲလိုဆိုရင္ အေ၀းမွာရွိတဲ့ သူငယ္ခ်င္းေတြကို အကူညီေတာင္း ၀င္ ျပင္ ခိုင္း လို႕ရတဲ့ ေဆာ၀ဲေလးပါ။ အင္တာနက္လုိင္းရွိရံုႏွင္႔ မိမိကြန္ပ်ဴတာကေန တၿခားကြန္ပ်ဴတာကုိ ဝင္ႀကည္႔ လုိ႔ရပါတယ္။
ဘယ္ေလာက္ပဲ ေ၀းေနပါေစ ၀င္ၾကည့္လို႕ရပါတယ္။ ေဆာ၀ဲကို install ျပီးတာ နဲ႕ ကုိယ္ရဲ႕ You ID ႏွင္႔ Password ၿပေနလိမ္႔မည္။ မိမိေပးဝင္ခ်င္သည္႔ သူငယ္ခ်င္းကုိ ကုိယ္ရဲ႕ID ႏွင္႔ Password ေပးလုိက္ရင္ ကို႕ကြန္ျပဴတာ ကို သူငယ္ခ်င္းက ၀င္ျပင္ေပးနိုင္မွာျဖစ္ပါတယ္။


TeamViewer is the fast, simple and friendly solution for remote access over the Internet - all applications in one single, very affordable module.
Remote control of computers over the Internet, Instantly take control over a computer anywhere on the Internet, even through firewalls. No installation required, just use it fast and secure. Training, sales and teamwork, TeamViewer can also be used to present your desktop to a partner on the Internet. Show and share your software, PowerPoint presentations etc. File transfer, chat and more, Share your files, chat, switch the direction during a teamwork session, and a lot more is included in TeamViewer.
Download setup: TeamViewer 9.0.24322 | 5.7 MB (Free for personal use)
Download: Portable TeamViewer | 10.9 MB
View: Home page | Changelog
                               
ေအးေက်ာ္(နည္းပညာ)


FB ခ်စ္ပရိတ္သတ္ႀကီးမ်ားခင္ဗ်ား ေအးေက်ာ္(နည္းပညာ) ဆိုက္မွာ ဖုန္းေဆာ့၀ဲ ဂိမ္းမ်ား သတင္းစေသာ အသစ္ကေလးမ်ားကို အခ်ိန္နဲ႔တစ္ေျပးညီ တင္ေပးေနတာမို႔ FB Page ေလးကို LIKE ေပးၿပီး အားေပးႏိုင္ပါတယ္။(အားလံုးကို ေက်းဇူးတင္ပါတယ္)

5ႏွစ္စာလိုင္စင္နဲ႕ Avira Internet Security Suite 2015 + 2020 License


http://picscdn.redblue.de/doi/pixelboxx-mss-65949696/fee_786_587_png/Avira-Internet-Security-Suite-2015---2-User

Avira Internet Security Suite 2015 အသစ္ထြက္လာလို႕ထပ္ျပီးတင္ေပးလိုက္ပါတယ္ဗ်ာ။ ကြန္ျပဴတာ တစ္လံုးမွာ Antivirus ဆိုတာက မရွိမျဖစ္ထည့္သြင္းထားဖို႕လိုကိုလိုအပ္ပါတယ္ဗ်ာ။ Avria ကေတာ့ ကၽြန္ေတာ္သေဘာက်တဲ႕ Antivirus ေတြထဲမွာ အၾကိဳက္ဆံုးလို႕လည္းေျပာလို႕ရပါတယ္ဗ်ာ။ Antivirus ထဲ မွာ Avria ကိုေတာ့ကၽြန္ေတာ္လံုး၀ကို Recommend ေပးတယ္ဗ်ာ။ Virus ေတြကိုေတာ့ အေတာ္ေလးကို ရွင္းတဲ႕ေကာင္ဗ်ာ။ Trojan , Worms , Malware , Spyware , Autorun , စတာေတြအျပင္ အျခားေသာ Viurs အေတာ္မ်ားမ်ားကို သတ္ေပးႏိုင္ပါတယ္ဗ်ာ။ မိမိရဲ႕ကြန္ျပဴတာ အတြင္း မွ Virus မ်ားကိုသာမက Network ခ်ိတ္ဆက္ထားခဲ့ရင္လည္း Network ထဲမွာရွိေနတဲ့ Antivirus မ်ားကို လည္း ဖယ္ရွားရွင္းလင္းေပးနိုင္ပါတယ္။ License အတြက္ကေတာ့ မပူပါနဲ႕ 2020 အထိ 5ႏွစ္စာလိုင္စင္ ပါျပီးသားပါဗ်ာ။ စိတ္ၾကိဳက္အသံုးျပဳနိုင္ပါတယ္။ အေသးစိတ္ကိုေတာ့ ေအာက္မွာ ဆက္လက္ေလ့လာနိုင္ပါ တယ္ဗ်ာ။


Avira Internet Security Suite 2015 final release - A very high-performing Anti-Virus tool that combines a complete set of tools and enriched with security improvements to protect user's home computer and business network PCs against suspicious threats and virus infections in all its kinds. This ideal application includes an anti-virus for local disk protection, a robust Firewall to protect incoming/out-coming connections and controls applications gestures, an Anti-Spyware, a Phishing-Scam protection against hackers and Scammers, Anti-Rippers, Email protections as well as it provides protection for online Internet activities. This makes Avira Internet Security 2015 a reliable all-in-one protection suite with modern security innovations.

  --->Avira Internet Security Suite 2015 Features<---
As it name suggests, Avira Internet Security Suite 2015 provides a powerful permanent security is at your disposal to meet your needs. Unlike Avira AntiVirus 2015, this one emphasizes on protecting the users online activities, ensure safe navigation, protects all browsers including IE, FireFox, Chrome and Opera. It prevents malicious connections from reaching your personal information, blocks unauthorized access to user's profiles and data such as (Credit Cards, Bank Accounts, Billing Address, Payment Accounts), recognizes and blocks fake products selling websites, blocks suspicious online transactions and so much more.

Additionally, Avira Internet Security Suite 2015 has come with a new feature called "ProActiv" to protect hard drives including files, folder, partitions and all directories from getting infected. The ProActiv feature intelligently analyzes the behavior of a computer and detects threats. Of course, you always have the ability to delete, move or quarantine virus infected files. Avira Internet Security Suite 2015 also offers an aside optimization tool to repair operating systems for better performance.

Avira Internet Security Suite 2015 free download is compatible with Windows 7 (32-64 bit), Windows 8/8.1 (32-64 bit), Windows Vista (x86-x64), Windows XP (32-64 bit).
  --->How to Install Avira Internet Security Suite 2015<--- 
 Step 1-  Avira Internet Security Suite 2015 consists of two applications which must be both installed.
 Step 2-  Install the program - Double click on "avira_antivirus_pro_en.exe" and "avira_speedup_internetsecuritysuite.exe".
Open "Avira Internet Security Till 17.9.2020.key" and merge to system.
 Step 3-  Enjoy Avira Internet Security Suite 2015 Full Version.
 
FB ခ်စ္ပရိတ္သတ္ႀကီးမ်ားခင္ဗ်ား ေအးေက်ာ္(နည္းပညာ) ဆိုက္မွာ ဖုန္းေဆာ့၀ဲ ဂိမ္းမ်ား သတင္းစေသာ အသစ္ကေလးမ်ားကို အခ်ိန္နဲ႔တစ္ေျပးညီ တင္ေပးေနတာမို႔ FB Page ေလးကို LIKE ေပးၿပီး အားေပးႏိုင္ပါတယ္။(အားလံုးကို ေက်းဇူးတင္ပါတယ္)

Internet & Computer ရဲ႕ Speed ကိုပိုမိုျမန္ဆန္လာေစမယ့္ - Auslogics BoostSpeed Premium v7.8.0.0 + KeyMaker


Auslogics%2BBoostSpeed%2BPremium%2B7

Auslogics BoostSpeed ဆိုတဲ႕ စြယ္စံုသံုး Maintenance Tool ကိုေတာ့ ေတာ္ေတာ္မ်ားမ်ား ရင္းႏွီး ၾကမယ္လို႕ ထင္ပါတယ္ဗ်ာ။ မိမိရဲ႕ ကြန္ျပဴတာအတြက္ အသံုးတည့္ေစမယ့္ Tools ေပါင္း 13မ်ိဳးအထက္ ပါ၀င္ပါတယ္ဗ်ာ။ သူငယ္ခ်င္းတို့ရဲ့ကြန္ျပဳတာနဲ့ အင္တာနက္ကိုျမန္ဆန္ေအာင္လုပ္ဖို့ အစြမ္းထက္တဲ့ optimizer ေဆာ့လ္ဝဲျဖစ္ ပါတယ္၊ ကြန္ျပဳတာကို သန့္ရွင္းေပးျပီး ျမန္ဆန္ေအာင္ လုပ္ေပးပါတယ္။ Startup ျမန္ဆန္ျခင္း ၊ အင္တာ နက္ျမန္ႏွုန္းျမွင့္ေပးျခင္း၊ Internet Explorer, Firefox တို့မွာမလိုအပ္ တဲ့ဖိုင္မ်ားကိုလည္းရွင္းလင္းေပးဖို႕ လုပ္ေဆာင္ေပးႏိုင္ပါတယ္။Registry ႏွင့္ Disks ကမလိုအပ္တဲ့ junk files ေတြကိုလည္းရွင္း ထုတ္ေပးပါတယ္။  Disk Defrag , Internet Optimizer , Tweak Manager , Duplicate File Finder , File Shredder , Disk Wiper , Startup Manager , Uninstall Manager , Service Manager , Task Manager , System Information , Rescue Center , Browser Manager စတဲ႕ Tools ေတြပါ၀င္ပါတယ္။ ရင္းႏွီးျပီးသားကေတာ့ အေပၚမွာေျပာျပခဲ႕တဲ႕ Feature ေတြကိုသိႏိုင္ ပါတယ္။ မသိေသးသူမ်ားအတြက္လည္း Tools တစ္ခုခ်င္းရဲ႕ လုပ္ေဆာင္ခ်က္အေသး စိတ္ကိုရွင္းျပေပး ထားပါတယ္ဗ်ာ။ ဒီေဆာ့လ္ဝဲကို Windows XP / Vista /7 / 8 တင္ထားတဲစက္မွာအ သံုးျပဳႏိုင္ပါတယ္။

   Download

 ေအးေက်ာ္(နည္းပညာ)
   koayekyaw.blogspot.com  

FB ခ်စ္ပရိတ္သတ္ႀကီးမ်ားခင္ဗ်ား ေအးေက်ာ္(နည္းပညာ) ဆိုက္မွာ ဖုန္းေဆာ့၀ဲ ဂိမ္းမ်ား သတင္းစေသာ အသစ္ကေလးမ်ားကို အခ်ိန္နဲ႔တစ္ေျပးညီ တင္ေပးေနတာမို႔ FB Page ေလးကို LIKE ေပးၿပီး အားေပးႏိုင္ပါတယ္။(အားလံုးကို ေက်းဇူးတင္ပါတယ္)

အရိုးရွင္းဆံုး Windows 7 တင္နည္း


အရိုးရွင္းဆံုး Windows 7 တင္နည္း

မဂၤလာပါ
ဒီေန႔ေတာ့ Windows 7 တင္နည္းကို အားလံုးအတြက္ တင္ေပးလိုက္ပါတယ္။
Windows တစ္ခုကို စတင္ၿပီး Install လုပ္ေတာ့မယ္ဆိုရင္ေတာ့ Windows 7 ကိုတင္ယူႏိုင္ဖို႔ရန္အတြက္
Requirement ေခၚတဲ့ အခ်က္အလက္နဲ႔ ျပည့္စံုပါမွ Windows ကိုအဆင္ေျပေျပ တင္ယူႏိုင္မွာျဖစ္ပါတယ္။
Windows 7 ကိုတင္ဖိုရန္ လိုအပ္ခ်က္ေတြကေတာ့ ေအာက္ပါအတိုင္းျဖစ္ပါတယ္။
Windows 7 system requirements
===================
1 gigahertz (GHz) or faster 32-bit (x86) or 64-bit (x64) processor
1 gigabyte (GB) RAM (32-bit) or 2 GB RAM (64-bit)
16 GB available hard disk space (32-bit) or 20 GB (64-bit)
DirectX 9 graphics device with WDDM 1.0 or higher driver
ျမန္မာလိုေတာ့ ရွင္းျပေနစရာမလိုေလာက္ေတာ့ဖူးလို႔ထင္ပါတယ္။  
 စာကိုျမင္တာနဲ႔သေဘာေပါက္ေလာက္မွာပါ၊ တကယ္လို႔မိမိကြန္ပ်ဴတာက အထက္ပါ လိုအပ္ခ်က္ေတြနဲ႔ ျပည့္စံုေနတယ္ဆိုရင္ေတာ့ Windows 7 တစ္ခုကို အရိုးရွင္းဆံုးနည္းကို ေအာက္မွာ ဆက္ေလ့လာၾကည့္ရေအာင္ပါ။
Windows တစ္ခုကို Install စတင္လုပ္ေဆာင္ေတာ့မယ္ဆိုရင္ေတာ့ သင့္မွာ ၀င္းဒိုးအေခြ DVD တစ္ခ်ပ္ေတာ့ လိုအပ္ပါမယ္။ အားလံုးအသင့္ျဖစ္ရင္ေတာ့ ကြန္ပ်ဴတာရဲ့ Power ကိုစတင္ဖြင့္လိုက္ပါ။
Delete Key ကိုႏွိပ္ထားပါ၊ အခ်ိဳ႕ေသာ ကြန္ပ်ဴတာတိုု႔တြင္ F2 Key ကိုႏွိပ္ေပးထားပါ။ ေသခ်ာေစရန္ CMOS Setup ေပၚလာသည္အထိ ေလး ငါးခါ ေလာက္ ဆက္တိုက္ႏွိပ္ထားေပးပါ။
Windows 7 DVD အေခြကိုထည့္လိုက္ပါ။
Advanced BIOS Features ဆိုတာကိုႏွိပ္ပါ အနီေရာင္နဲ႔၀ိုင္းျပထားပါတယ္။


First Boot Device OR Boot sequence ဆိုတာကို ရွာၿပီး
First Boot ေနရာမွာ CDROM ထားပါ။ Second Boot ေနရာမွာ Harddisk OR HDD-0 ကိုထားပါ။


ၿပီးလွ်င္ F10 Key ကိုႏွိပ္၊ Yes OR Enter Key ကိုႏွိပ္ေပးလိုက္ပါ။

စက္က Restart က်သလို က်သြားပါလိမ့္မယ္ ေစာင့္ေနပါ၊ စက္ျပန္တက္လာတဲ့အခါ၊

Press any key to boot from DC or DVD……

ဆိုၿပီးစာေၾကာင္းအျဖဴေရာင္ေလးနဲ႔ေပၚလာခဲ့ရင္ေတာ့ Enter Key ကုိႏွိပ္ေပးလို္က္ပါ။


Windows Files မ်ားကို ကူးယူေနတုန္းေလး ေခတၱေစာင့္ေနလုိက္ပါ။

Starting Windows ဆိုၿပီးေအာက္ကပံုအတိုင္းျမင္ေနရရင္ေတာ့ ခနေလးေစာင့္ေနလိုက္ပါ

Install Windows ဆိုၿပီးေပၚလာတဲ့အခါ ဘာမွထပ္ေရြးေပးစရာမလိုေတာ့ပါ Next ကိုႏွိပ္လိုက္ပါ။

ေအာက္ကပံုအတိုင္းေပၚလာခဲ့ရင္ေတာ့ Install Now ဆိုတာကိုႏွိပ္ေပးလိုက္ပါ။


Setup is starting ဆိုၿပီး ေအာက္ကပံုအတိုင္းေပၚလာခဲ့ရင္ေတာ့
 ခနေလးေစာင့္ေနလိုက္ပါ


မိနစ္အနည္းနယ္ၾကာၿပီးလို႔ ေအာက္ကပံုအတိုင္းေပၚလာခဲ့ရင္ေတာ့ Operating System OS ကိုေရြးေပးရမွာျဖစ္ပါတယ္၊ ဒါကေတာ့ က်ေနာ့္ Windwos DVD ေခြက All in One အမိ်ဳးအစားျဖစ္ေနလို႔ Operating System မ်ားေနတာပါ။ မိမိအသံုးျပဳလိုတဲ့ Windows Operating System ကိုေရြးေပးရမွာျဖစ္ပါတယ္၊ အခုက်ေနာ္ကေတာ့ Windows 7 Ultimate x86 ကိုေရြးေပးလိုက္ပါတယ္။


ေအာက္ကပံုအတုိင္း ျမင္ေနရရင္ေတာ့ I accept the license terms ဆိုတဲ့
 ေလးေထာင့္ကြက္ေလးကို အမွန္ျခစ္ေလးေပးပါ၊ ၿပီးရင္ Next ကိုႏွိပ္ေပးလိုက္ပါ။


Windows အသစ္တင္ယူမွာျဖစ္လို႔ Custom (Advanced) ဆိုတာကိုေရြးေပးလိုက္ပါ။


Custom (Advanced) ေရြးၿပီးလို႔ ေအာက္ကပံုအတိုင္းေပၚလာခဲ့ရင္ေတာ့ တကယ္လို႔ သင့္ကြန္ပ်ဴတာမွာ
Partation ေတြမ်ားေနခဲ့ရင္ေတာ့ မိမိ Windwos တင္လို႔ Harddisk Partation ကိုေရြးေပးရမွာျဖစ္ပါတယ္။ က်ေနာ္မွာေတာ့ Partation တစ္ခုတည္းပဲ ျဖစ္ေနလို႔ Next ကိုပဲႏွိပ္ေပးလိုက္ပါတယ္။


တကယ္လို႔ ၀င္ဒိုးကအရင္သံုးလက္စ အေဟာင္းရွိေနေသးတာတို႔ဆိုရင္ပဲျဖစ္ျဖစ္ အေၾကာင္းအမိ်ဳးမ်ိဳးေၾကာင့္ Windows အေဟာင္းကို Format ခ်လိုတာတို႔ Delete လုပ္လိုတာတို႔ဆိုရင္ေတာ့  Drive Option (Advanced) ဆိုတာကို ႏွိပ္ၿပီး Format ခ်ယူႏိုင္ပါတယ္။


Windows Files မ်ားကို Install ျပဳလုပ္ေနတုန္း ခနေစာင့္ေနပါ၊ Copying Windows files ကေန Completing installation အထိ %0 to %100 အထိေစာင့္ေနရပါမယ္ ဘာမွလုပ္ေပးစရာမလိုပါ။


Windows dialogue box က်လာၿပီးရင္ေတာ့ User name ေနရာမွာ မိမိနာမည္ကိုထည့္ပါ၊ 
Computer name ေနရာမွာေတာ့ မိမိကြန္ပ်ဴတာကို ထားလိုေသာနာမည္တစ္ခုခုကို
 ေရးထည့္ေပးလိုက္ပါ။ ၿပီးရင္ Next ကိုႏွိပ္လိုက္ပါ။


Password ထားၿပီးအသံုးျပဳလိုက ျဖည့္ေပးလိုက္ပါ။ ဒီေနရာမွာလည္း Password ေနရာမွာ မိမိထားလိုေသာ Password ကိုထားေပးပါ၊ ဥပမာ-Zunite (CEO) စသည္ေပါ့၊ စာလံုးအႀကီးအေသးအကုန္ရပါတယ္။
 Retype your password ဆိုတဲ့ေနရာမွာလည္း ေစာနားက Password ေနရာမွာထည့္ထားခဲ့တဲ့ Password ကိုထပ္ထည့္ေပးလိုက္ပါ။ Type password hint (required) ေနရာမွာေတာ့ အေပၚက မိမိထားခဲ့တဲ့ Password မတူတဲ့ နံပါတ္တစ္ခုခုျဖစ္ျဖစ္ စာပဲျဖစ္ျဖစ္ တစ္ခုခုကိုေရးရမွာျဖစ္ပါတယ္။ 
ေရးၿပီးလည္းအဲဒီ Hint password ကုိအေသခ်ာမွတ္ထားေပးလိုက္ပါ။ တယ္ကယ္လုိ႔ မိမိက password ကိုေမ့လို႔ ဖြင့္မရေတာ့တဲ့အခါ ေစာနားက hint လုပ္ထားတဲ့ Password ကိုျပန္ထည့္ေပးႏိုင္ရင္ ကြန္ပ်ဴတာ Lock ကိုေကာင္းေကာင္း ေျဖယူႏိုင္ပါတယ္။ ၿပီးရင္ Next ကုိႏွိပ္ပါ။
ထည့္ၿပီး အသံုးမျပဳလိုေသးဘူးဆိုရင္လည္း Next ကုိႏွိပ္ေပးလိုက္ပါ။


License agreement ျဖင့္၀ယ္ထားေသာ Windows မဟုတ္လွ်င္ေတာ့ Product Key ကိုမထည့္ပဲ automatically activate Windows when I’m online မွာရွိတဲ့ ေလးေထာာင့္ကြက္ေလးမွ အမွန္ျခစ္ေလးကိုျဖဳတ္ေပးၿပီး Next ကိုသာႏွိပ္ေပးလိုက္ပါ။


အဆင့္ေတြေက်ာ္လာခဲ့လို႔ ေအာက္ကပံုအတိုင္းျမင္ေနရရင္ေတာ့
 Ask me later ဆိုတာကိုေရြးေပးလိုက္ပါ။

Time zone ေရြးခိုင္းတဲ့ေနရာမွာေတာ့ မိမိေနတဲ့ ႏိုင္ငံရဲ့ Provide ကိုေရြးလိုက္ပါ။


Windows ကို Install လုပ္ေနတုန္း သင့္မွာ Internet Connection သာအသင့္ရွိေနၿပီး တစ္ခါတည္း Connected လုပ္ၿပီး Install လုပ္ယူသြားခ်င္တယ္ဆိုရင္ Wifi ရဲ့ လွ်ိဳ႕၀ွက္ခ်က္ ကုတ္နံပါတ္ကိုထည့္ေပးၿပီး မိမိအသံုးျပဳမယ့္ Network အမိ်ဳးအစားကို ေရြးေပးလိုက္ပါ။
Router အမိ်ဳးအစားသံုးတဲ့ သူေတြအထူးသျဖင့္ 10 User Or Group User အေနျဖင့္အသံုးျပဳေနၾကတဲ့ သူေတြကေတာ့ အေပၚဆံုး Home Network ကိုေရြးခ်ယ္ေပးလိုက္ပါ။


အားလံုးၿပီးလို႔ Windows is finalizing your setting ဆိုၿပီး ေအာက္ကပံုအတိုင္းေပၚေနရင္ေတာ့ ခနေစာင့္ေနလိုက္ပါ ကြန္ပ်ဴတာရဲ့ Desktop Screen ႀကီးေပၚလာသည္အထိေစာင့္ေနလိုက္ပါ။


Congratulations ေပါ့ဗ်ာ အေပၚကအဆင့္ေတြကို ေအာင္ျမင္စြာေက်ာ္ျဖတ္ခဲ့ၿပီးျဖစ္လို႔ 
Windows 7 Ultimate တင္ျခင္းကိစၥ ေအာင္ျမင္စြာၿပီးဆံုးပါၿပီ။


PDF စာအုပ္ အျဖစ္ သိမ္းဆည္းထားခ်င္တဲ့ ေဘာ္ဒါေတြကေတာ့
ေအာက္ကလင့္မွာေဒါင္းေလာ့ရယူလိုက္ပါ။

Download Here 

OR

Download Here

OR

Download Here 

OR

 Download Here

OR

Download Here

Windows 8 တင္နည္းကိုေတာ့ ေအာက္ကလင့္မွာ
ေဒါင္းေလာ့ရယူလိုက္ပါ

အရိုးရွင္းဆံုး Windows 8 တင္နည္း (ျမန္မာလို စာအုပ္)

Windows 10 တင္နည္းကိုေတာ့ ေအာက္ကလင့္မွာ
ေဒါင္းေလာ့ရယူလိုက္ပါ

Windows 10 Technical Preview Pro Edition & Enterprise Edition ဗားရွင္းအားလံုးကို အလြယ္တကူ Windows တင္နည္း  

အားလံုးပဲ အဆင္ေျပၾကလိမ့္မယ္လို႔ေမွ်ာ္လင့္ပါတယ္
အားလံုးကို ခင္မင္ေလးစားလွ်က္
   

အဆင္ေျပပါေစ
ဇူးနစ္(နည္းပညာ)
 www.zunite.org

FB ခ်စ္ပရိတ္သတ္ႀကီးမ်ားခင္ဗ်ား ေအးေက်ာ္(နည္းပညာ) ဆိုက္မွာ ဖုန္းေဆာ့၀ဲ ဂိမ္းမ်ား သတင္းစေသာ အသစ္ကေလးမ်ားကို အခ်ိန္နဲ႔တစ္ေျပးညီ တင္ေပးေနတာမို႔ FB Page ေလးကို LIKE ေပးၿပီး အားေပးႏိုင္ပါတယ္။(အားလံုးကို ေက်းဇူးတင္ပါတယ္)

Windows Tools ေပါင္းမ်ားစြာကို ေဆာ့၀ဲတစ္ခုတည္းနဲ႔ ကိစၥၿပီးႏိုင္တဲ့-Your Uninstaller! Pro v7.5 2014 Multilingual Full + Key


Your Uninstaller! Pro v7.5 2014 Multilingual Full + Key
မဂၤလာပါ
အကုိတစ္ေယာက္ေတာင္းဆိုလာတဲ့ ေဆာ့၀ဲပါ
အားလံုးလည္း အသံုးျပဳ ရေအာင္လို႔ တင္ေပးလိုက္ပါတယ္။

Your Uninstaller ဆိုတာေလးကေတာ့ သိတဲ့သူလဲသိၿပီးသားျဖစ္မွာပါ
 ကြန္ျပဴတာမွ အသံုးမျပဳေတာ့တဲ့ Software ေတြကို
 Uninstall လုပ္ေပးတဲ့ software ေလးပဲျဖစ္ပါတယ္။

 Software မ်ားကို uninstall ျပဳလုပ္လို႔ရတဲ့အျပင္ Startup Manager, Disk Cleaner,
Start Menu, Trace Eraser, File Shredder မ်ားေရာ့ Windows Tools ေပါင္းမ်ားစြာကို
ဒီ Software တစ္ခုထဲနဲ႔ ကိစၥၿပီးသြားမွာျဖစ္ပါတယ္။

Software uninstall မ်ားလုပ္ရာတြင္လဲ ျမန္ဆန္စြာအသံုးျပဳႏိုင္ပါတယ္။
အျမဲတမ္းအသံုးျပဳ လို႔ရေအာင္လို႔ Zip ဖိုင္ထဲမွာ Serial Key ကိုတစ္ပါတည္း
ထည့္ေပးထားပါတယ္။ အသံုးလိုတဲ့ ေဘာ္ဒါေတြကေတာ့
 ေအာက္ကလင့္ေတြမွာ ေဒါင္းေလာ့ရယူႏိုင္ပါၿပီ။

Insatallation Guide
============
၁။ ေဒါင္းေလာ့ရလာတဲ့ Zip ဖိုင္ကို Right Click တစ္ခ်က္ေထာက္ၿပီး
Exrtarct files ျဖင့္ ေျဖလိုက္ပါ။
၂။ your-uninstaller-setup7.exe ဖိုင္ကို Right Click တစ္ခ်က္ေထာက္ၿပီး
Run as administer ျဖင့္ အင္စေတာလုပ္ပါ။
 ၿပီးရင္ Next ေတြကိုႏွိပ္ေပးၿပီး Finish ကိုႏွိပ္ေပးလိုက္ပါ။
၃။ Serial Key ဖိုင္ထဲမွ User name & Serial Key ကို Copy ကူးထည့္ေပးလိုက္ပါ။
၄။ Full Version အျဖစ္ အျမဲတမ္းအသံုးျပဳလို႔ရပါၿပီ။

Download Here

OR

Download Here

အဆင္ေျပပါေစ
ဇူးနစ္(နည္းပညာ)
FB ခ်စ္ပရိတ္သတ္ႀကီးမ်ားခင္ဗ်ား ေအးေက်ာ္(နည္းပညာ) ဆိုက္မွာ ဖုန္းေဆာ့၀ဲ ဂိမ္းမ်ား သတင္းစေသာ အသစ္ကေလးမ်ားကို အခ်ိန္နဲ႔တစ္ေျပးညီ တင္ေပးေနတာမို႔ FB Page ေလးကို LIKE ေပးၿပီး အားေပးႏိုင္ပါတယ္။(အားလံုးကို ေက်းဇူးတင္ပါတယ္)

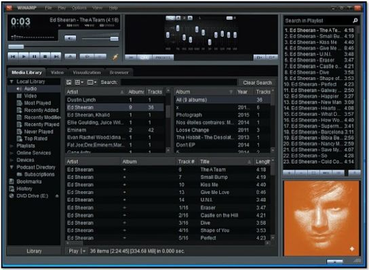
Downlaod Winamp 5.66 Final Pro


Winamp playerဆိုရင္လူတိုင္းေျပာစရာမလိုေအာင္သိေနၾကပါျပီ ဒီေန႔ေတာ့ Winamp Pro Player ေလးကိုေတြ႕လို႔ျပန္တင္ေပးလို္က္ပါတယ္ ကၽြန္ေတာ့္စမ္းၾကည့္ျပီးသြားျပီအားလံုးအဆင္ေျပတယ္ ဖူးဘားရွင္းအတြက္လည္းအထဲမွာကီးဖိုင္ထည့္ေပးထားပါတယ္ဗ်ာ ကဲသူငယ္ခ်င္းတို႔ဒီပေလယာေလးကိုအသံုးျပဳခ်င္တယ္ဆိုရင္ေတာ့ေဒါင္းမွာေဒါင္းယူသြားႏို္င္ပါတယ္ခင္ဗ်ာ


          Download
  
                    ေအးေက်ာ္(နည္းပညာ)
                  koayekyaw.blogspot.com 

FB ခ်စ္ပရိတ္သတ္ႀကီးမ်ားခင္ဗ်ား ေအးေက်ာ္(နည္းပညာ) ဆိုက္မွာ ဖုန္းေဆာ့၀ဲ ဂိမ္းမ်ား သတင္းစေသာ အသစ္ကေလးမ်ားကို အခ်ိန္နဲ႔တစ္ေျပးညီ တင္ေပးေနတာမို႔ FB Page ေလးကို LIKE ေပးၿပီး အားေပးႏိုင္ပါတယ္။(အားလံုးကို ေက်းဇူးတင္ပါတယ္)

Uniblue Driverscanner 2014 Full Version


Uniblue Driverscanner 2014

Uniblue Driverscanner  နာမည္ၾကီးေပါ့ေနာ္ ေလးကမိမိတို ့ရဲ ့ကြန္ပ်ဴတာမွာလိုအပ္ေနတဲ ့driver ေတြကို ကလစ္တစ္ခ်က္တည္းနိပ္ရံုနဲ ့အဆင္ေျပသြားမွာပါ။ကြန္ပ်ဴတာအခုမွစသံုးတဲ ့သူငယ္ခ်င္းေတြေရာ services သမားေတြပါေဆာင္ထားသင္ ့ပါတယ္။ျပိီးေတာ ့ system restor
point ေတြကိုလည္းအလိုအေလ်ာက္ျပဳလုပ္ေပးျပီးေပ်ာက္ပ်က္ေနတဲ ့ driver ေတြကိုလည္းျပန္လည္ရယူေပးပါတယ္။သူ ့ကိုသံုးမယ္ဆိုရင္ေတာ ့ Windows7 ေတြမွာအသံုးျပဳလို ့ရပါတယ္ခင္ဗ်ာ
Old drivers may cause a range of problems, from diminished hardware functionality to conflicts and system crashes. Although drivers are available for free and can be updated manually, identifying outdated drivers can take a long time. Moreover, pinpointing just the right driver from the manufacturer’s website, downloading and installing it can be laborious and technically risky.
Built with simplicity in mind, DriverScanner scans your computer to provide a list of drivers that need to be updated. With single click convenience, DriverScanner will then safely install each update on your PC.

The key has a limited number of activations,so activate your copy quickly. If the key doesn't work then comment so,We’ll bring a fix soon

How to Activate ?

  • If you have used any cracks or patches,uninstall DriverScanner and install a fresh copy of it.
  • Insert the serial key given , while connected to internet.
  • Click Activate,that’s it.

See Screen Shot For Full Version Proof.
Uniblue Driverscanner 2014 Registered
23 Jan 2015